
Palo Alto MineMeld is an extensible Threat Intelligence processing framework and the multi-tool of threat indicator feeds. MineMeld can be used to collect, aggregate, and filter indicators from a variety of sources make them available for consumption to peers or the Palo Alto Networks security platforms.
That means this versatile tool can be used to grab data feeds of IPs, URLs, and domains. Also, aggregate, deduplicate, process it and output the final result in formats suitable to Palo Alto Networks products. MineMeld can also be configured to send data to Splunk.
Malware Patrol has determined the steps required to allow our customers to utilize our data feeds on MineMeld. The following steps are required to create a miner, a processor, and finally an output. Also, the entire process follows the logic of creating and configuring prototypes based on existing entities and later cloning them. Keep this in mind and the logic will be clearer as we move forward through each step.
We’ve created a specific Enterprise data feed for MineMeld consumption. The URL can be founded in the evaluation or customer portal. If you are a current customer, please contact your Sales Manager to have the feed added to your portal. This configuration guide shows how to extract URLs from that feed. In addition, the same logic can be applied to create new a miner, processor, and output for other indicators contained in the feed.
1) If you do not have MineMeld installed and configured yet, you can download a pre-configured virtual machine or the software’s source code from Github. Please visit the following URLs for more details:
a. https://www.paloaltonetworks.com/products/secure-the-network/subscriptions/minemeld
b. https://live.paloaltonetworks.com/t5/MineMeld-Articles/Manually-install-MineMeld-on-Ubuntu-Server-16-04/ta-p/253336
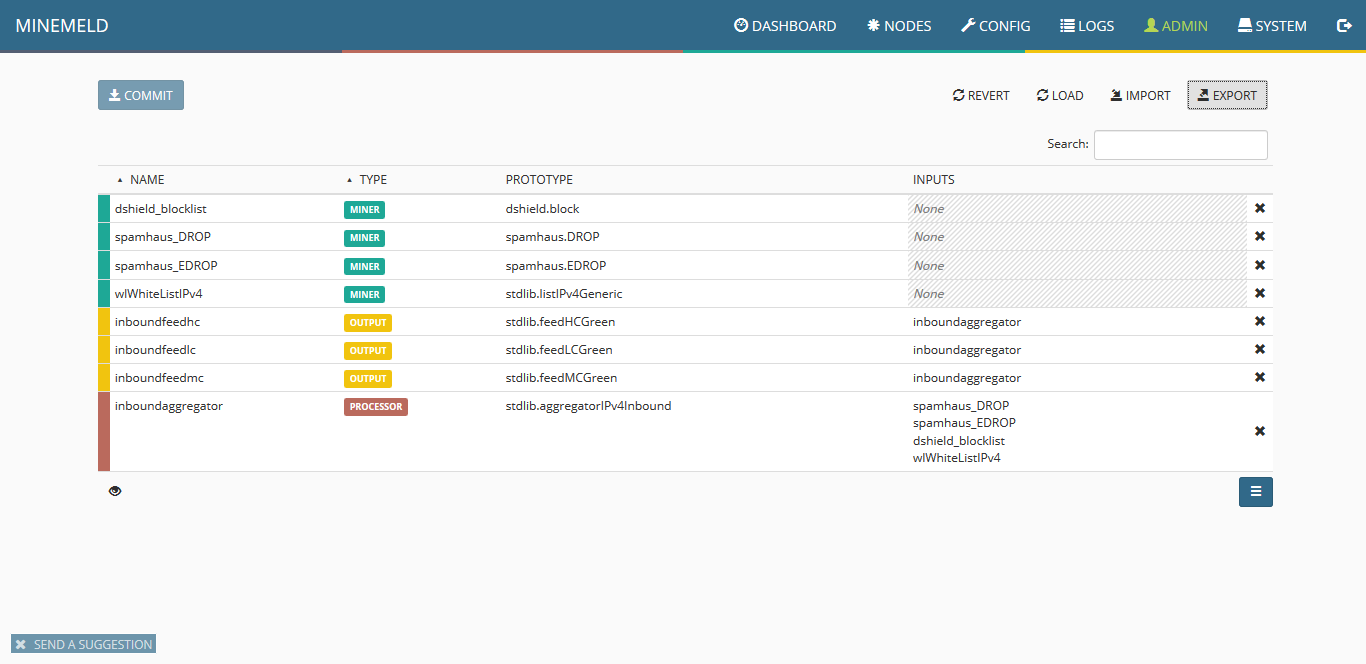
2) Once you successfully log in to MineMeld, click on Config to view the current list of miners, processors and œoutput.
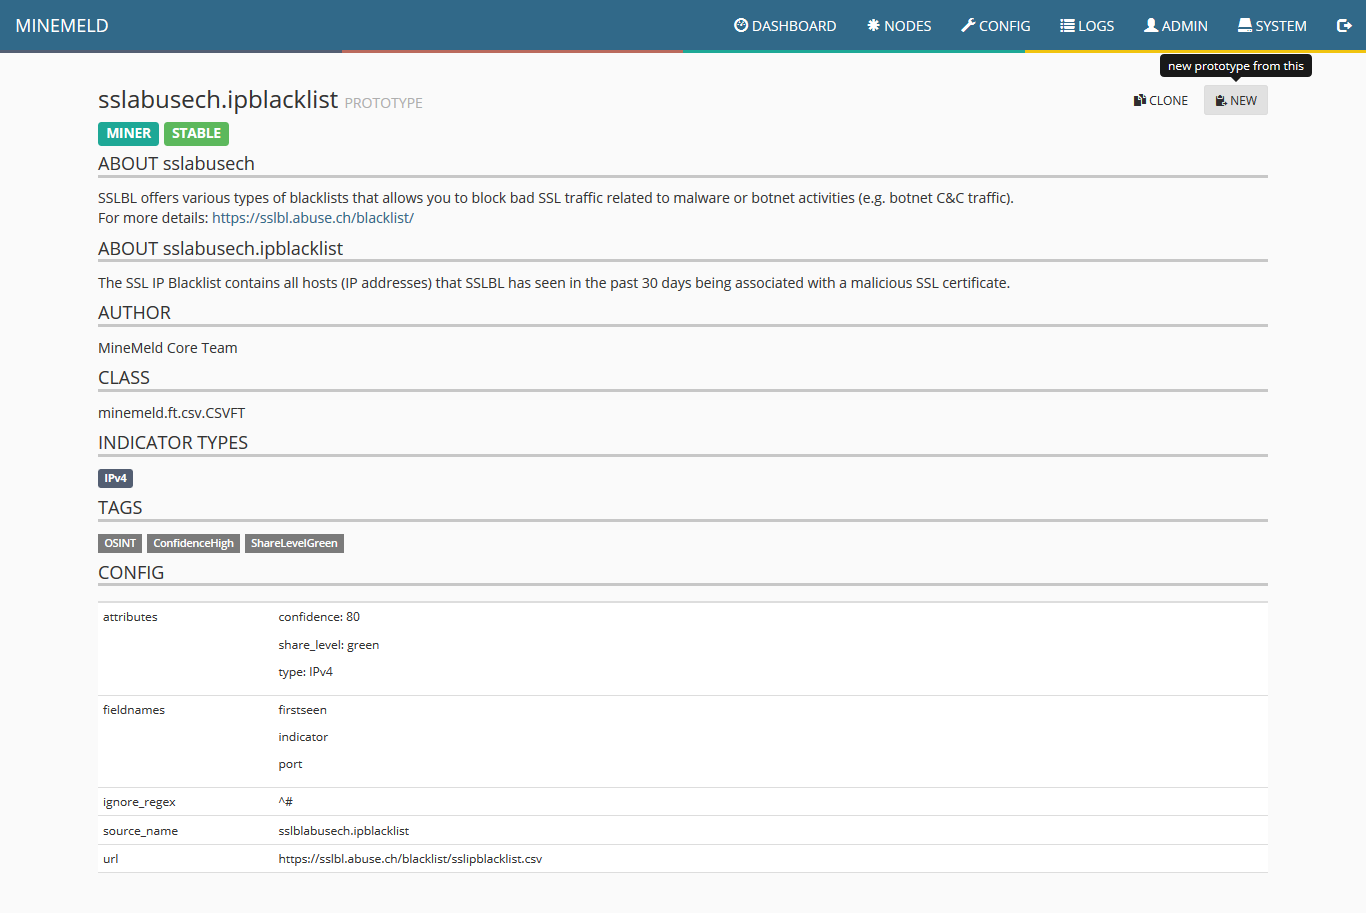
3) To configure a new miner prototype we will use an existing miner. Click the blue icon on the lower right corner of the screen named browse prototypes. In the search field, type “ssla” and once the list is updated, select “sslabusech.ipblacklist.”

4) Once the miner configuration is displayed, click on “new.”
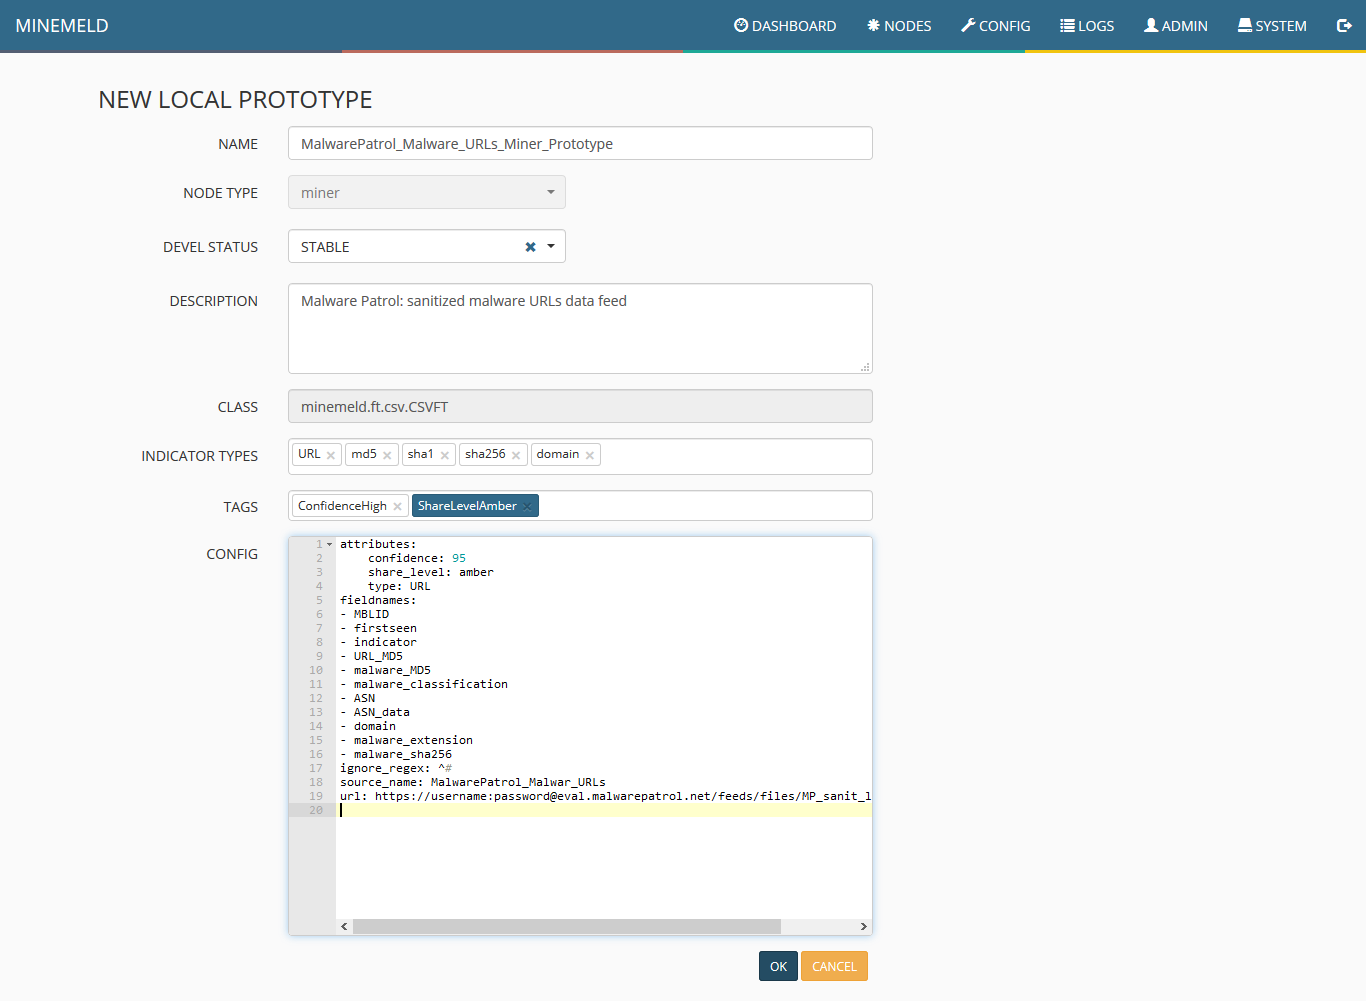
5) Make the necessary changes to each field according to the following image. Special attention must be taken to the field CONFIG and the line url. This must be filled with the URL of Malware Patrol’s data feed for the MineMeld data feed. As explained previously the address can be found in your evaluation or customer portal. After properly populating the fields, click “ok.”
6) You will see the new “miner prototype†created, click on it.
7) When the miner loads, click on clone.
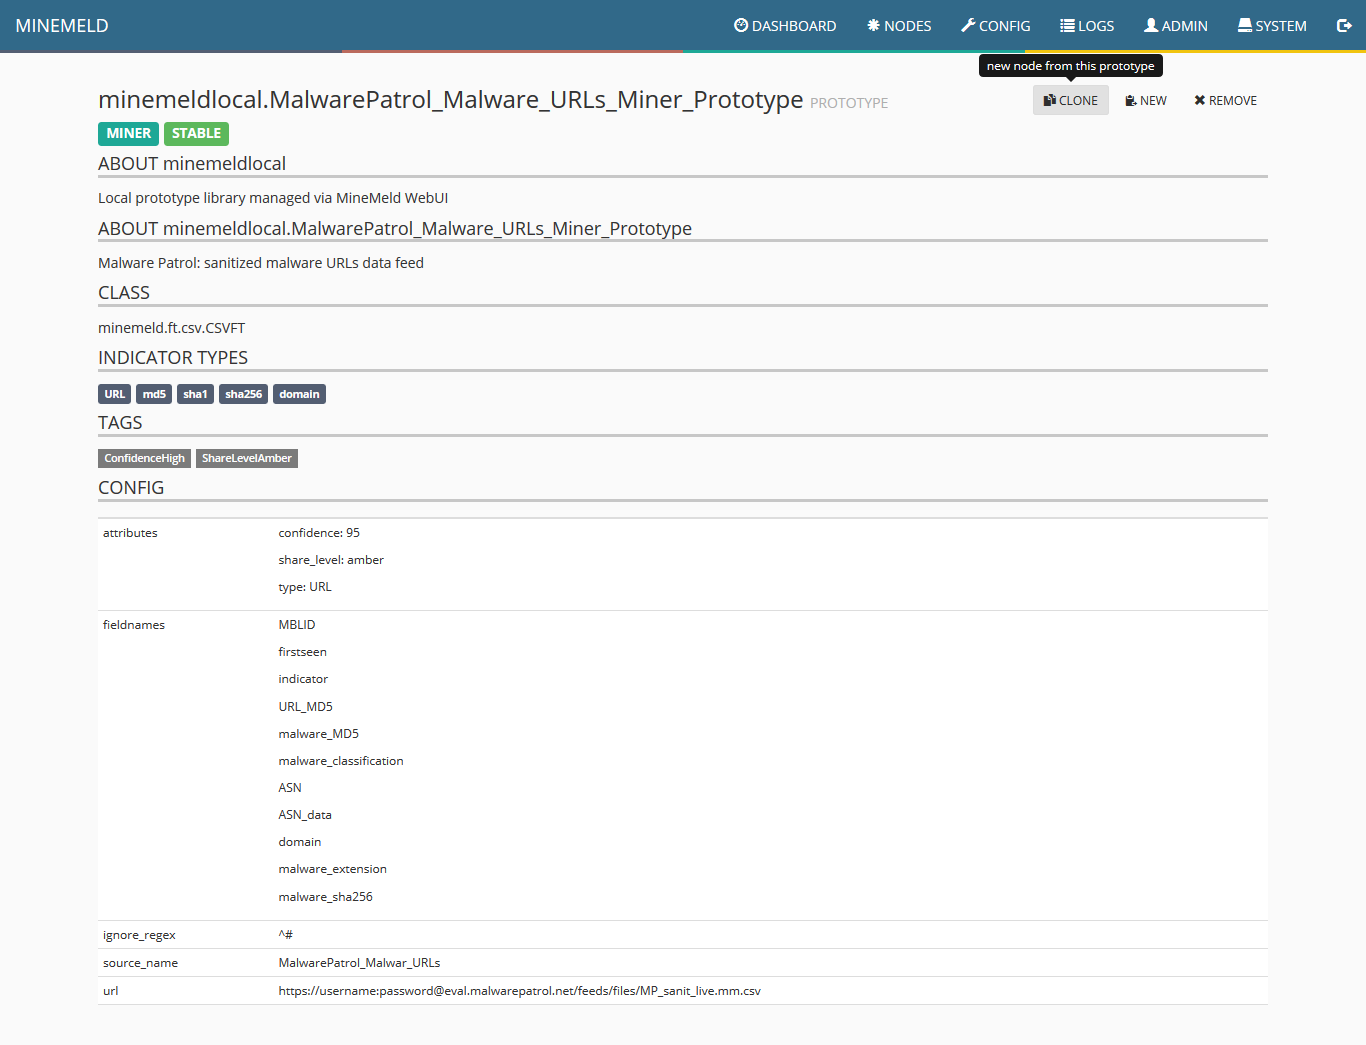
8) Fill the two fields as shown in the following screenshot and click “ok.”

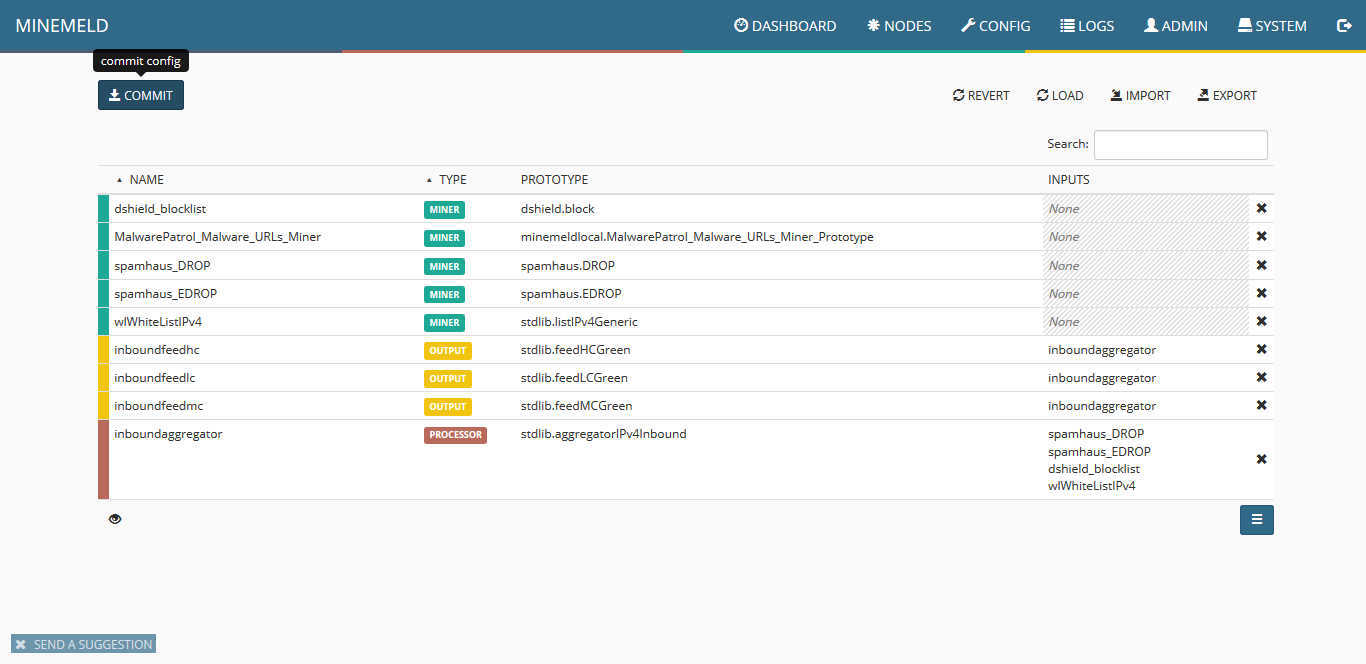
9) The screen will show all the available items, including the new miner. Click on “commit” to push the changes. Wait a few seconds as some components of MineMeld will be restarted.
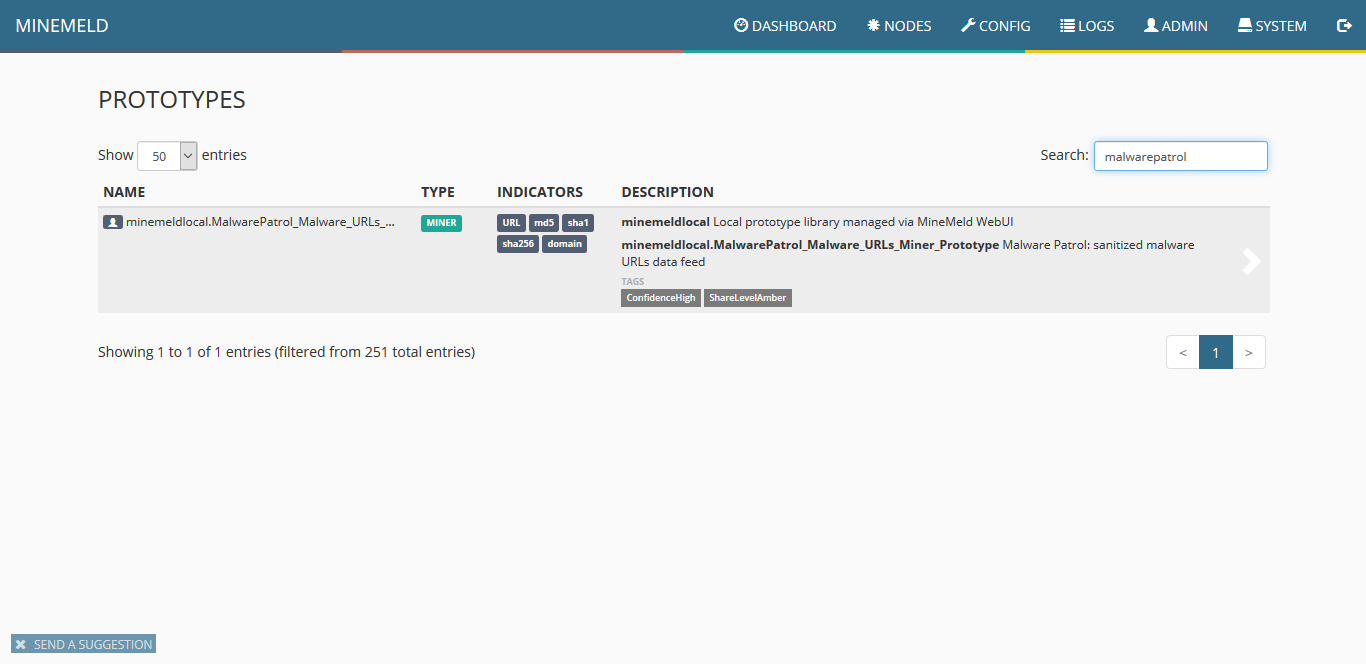
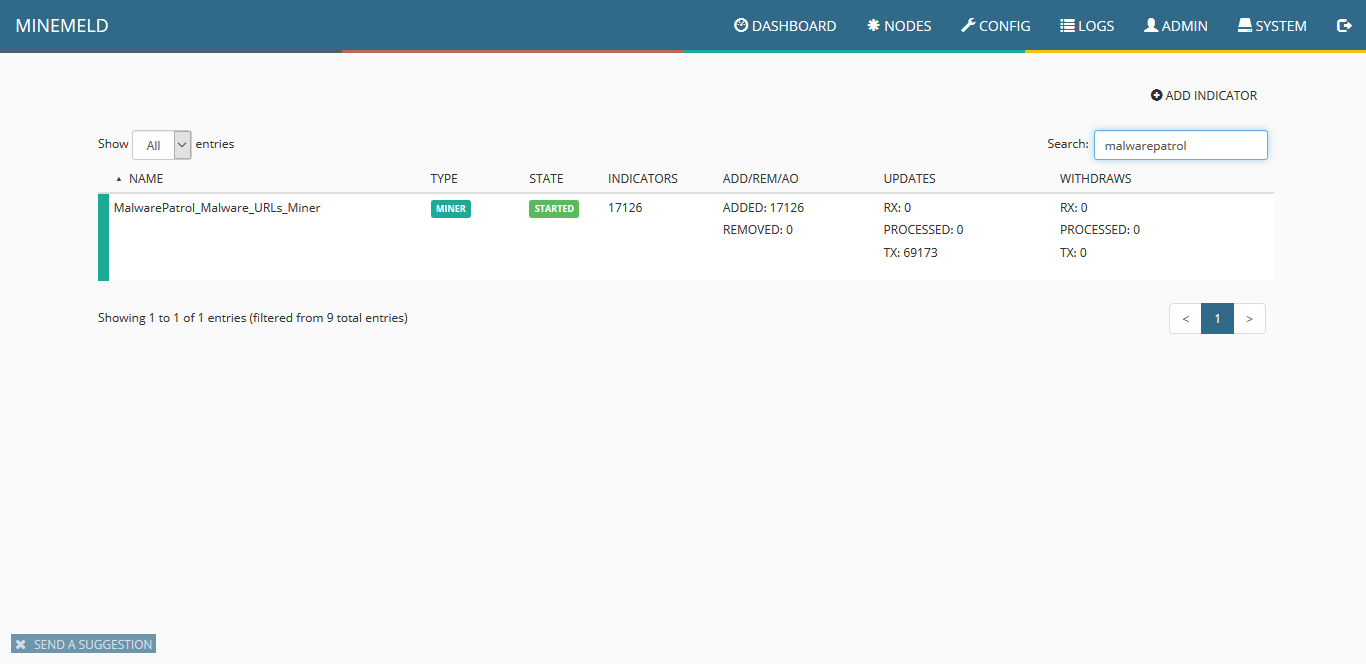
10) Click on “nodes” and use the search field to look for malwarepatrol You should see the new miner. Pay close attention to indicators that should show an increasing amount of items pulled from our data feed.
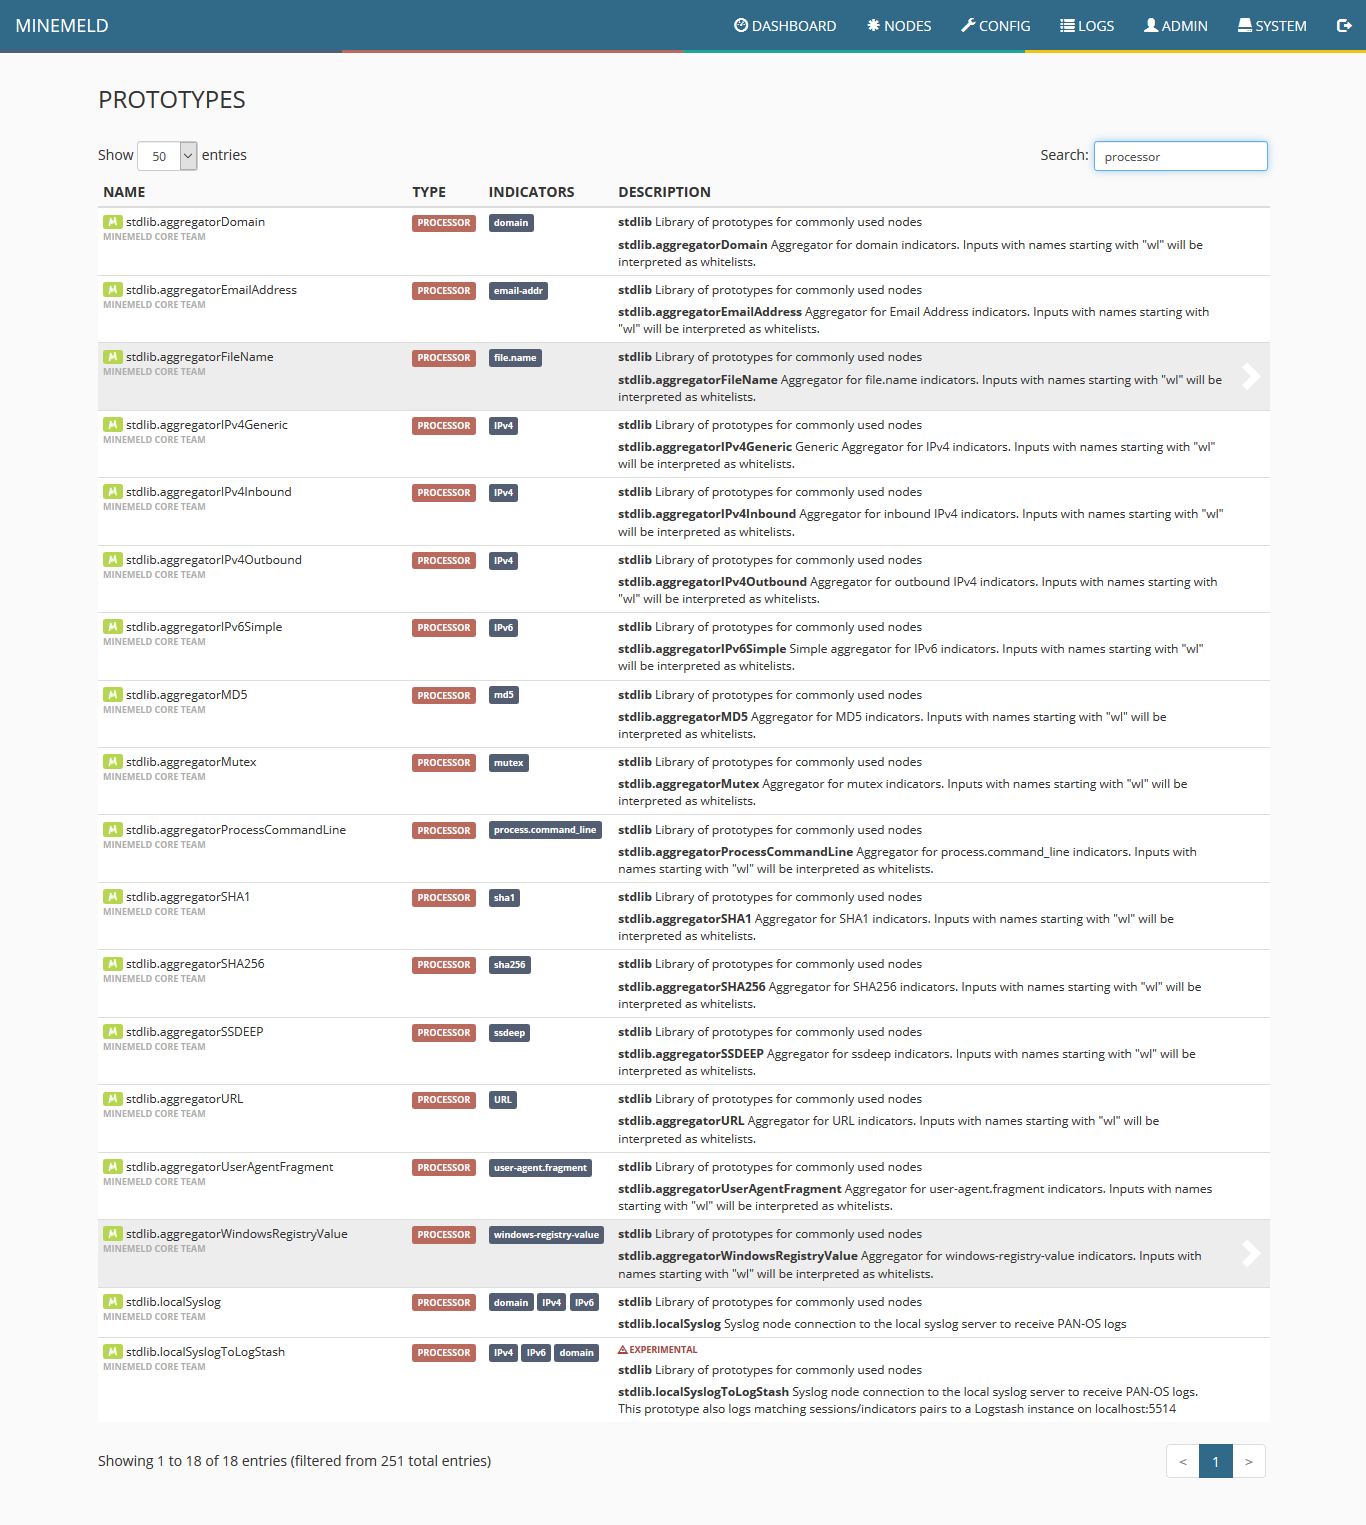
11) To create the processor prototype, click on config and then the blue icon on the lower right corner of the screen named browse prototypes. Search for processor. In the list displayed, click on stdlib.aggregatorFileName.
12) Click “new” and fill the form fields according to the following screenshot and click “ok.”
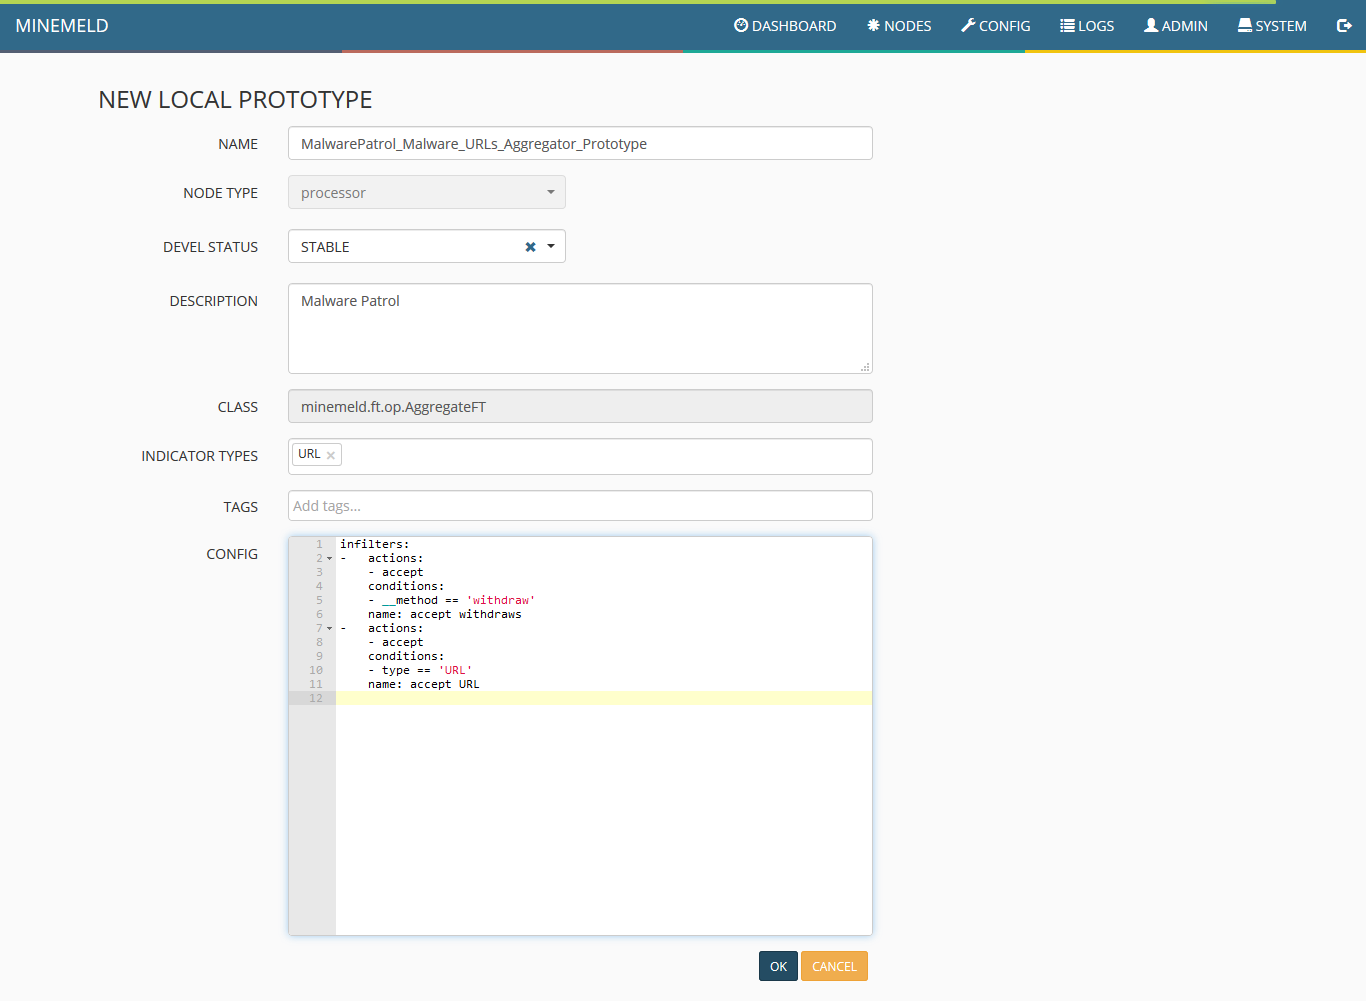
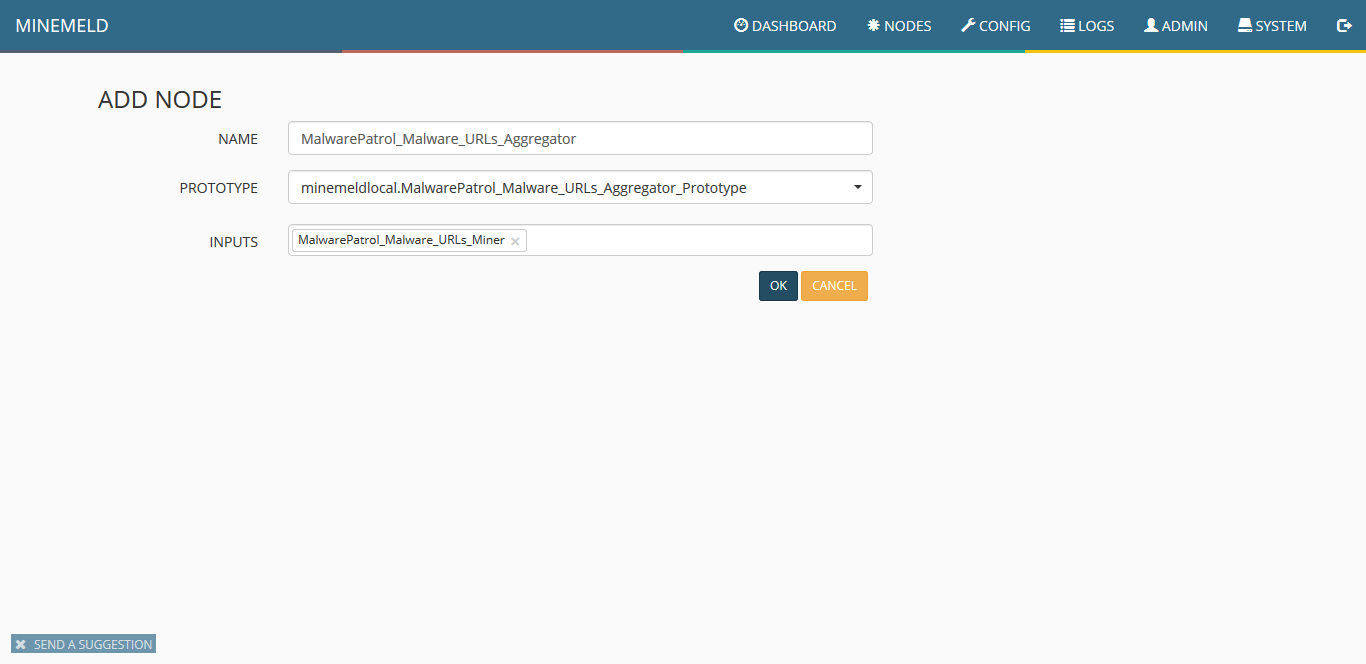
13) Once the list of prototypes is shown, click on the newly created one and choose “clone.” Fill the form according to the next screenshot.
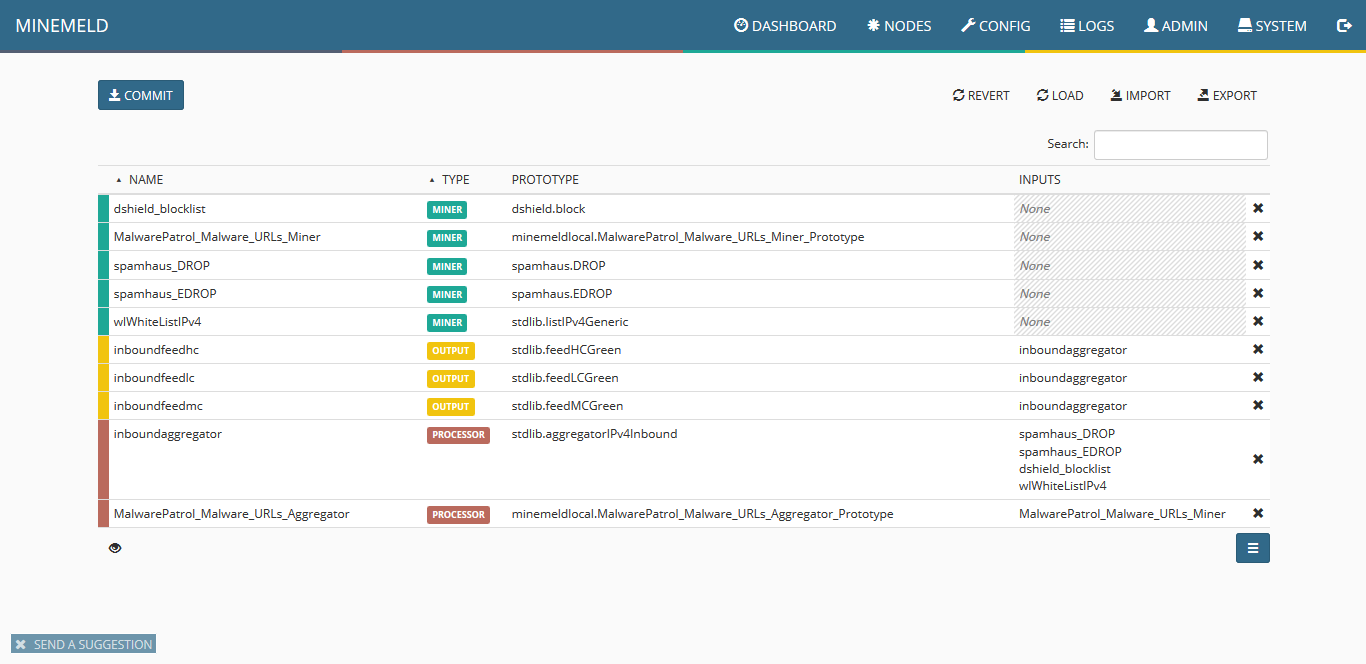
14) Clicking on config you should see a screen similar to the following:
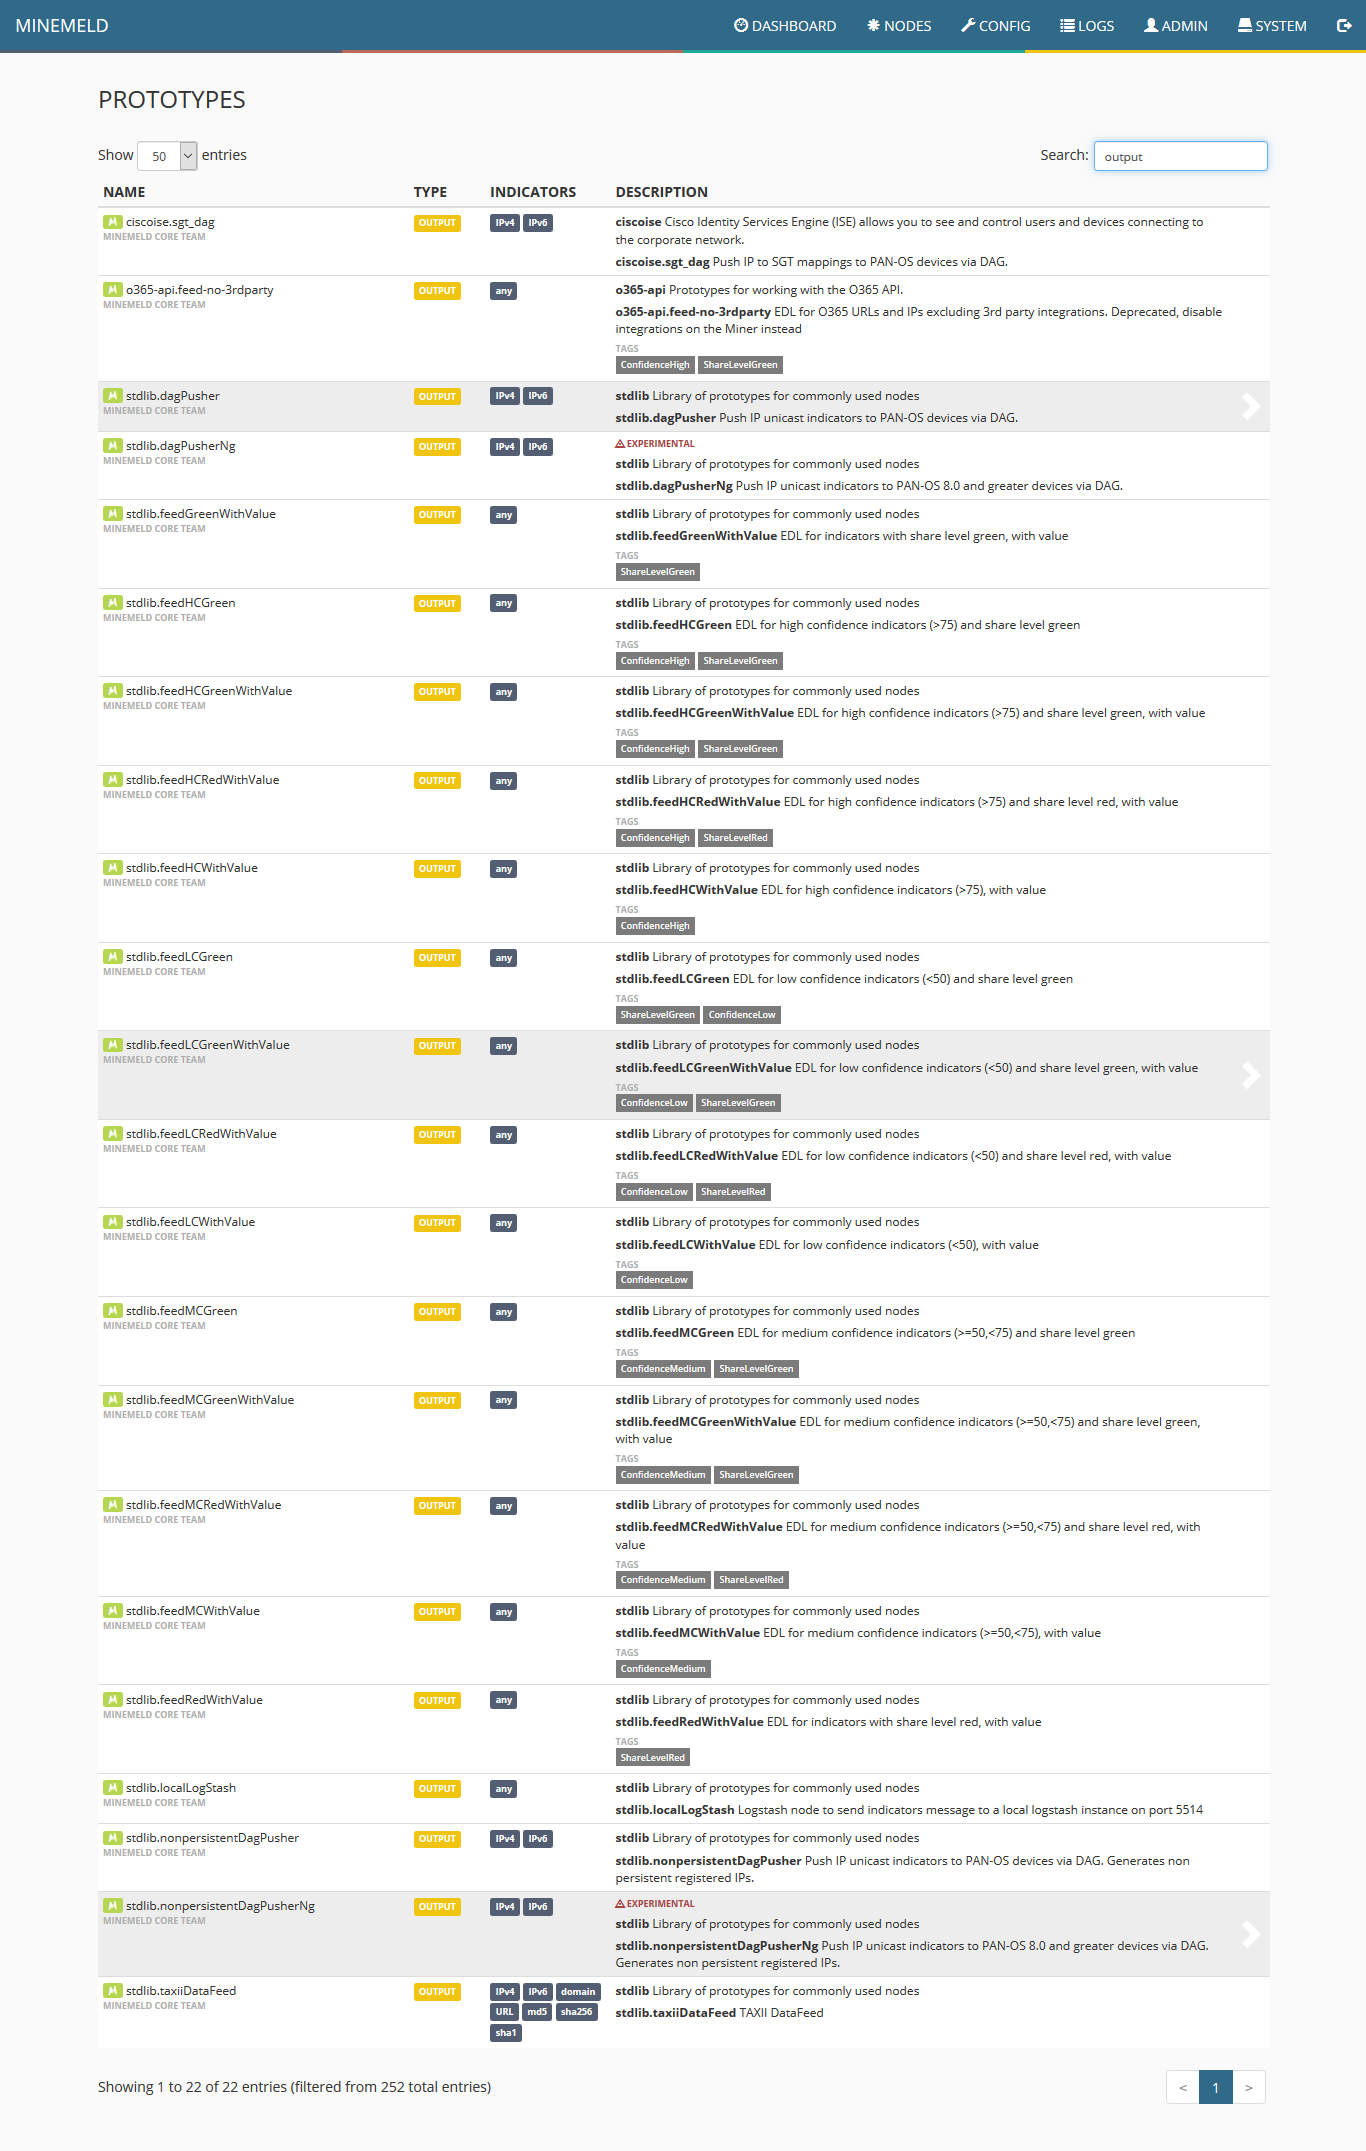
15) Now to create an output prototype, click the blue icon on the lower right corner of the screen named “browse prototypes.” Search for output and in the list that will be displayed, click “stdlib.dagPusher.”
16) Fill the form fields as in the following screenshot and click”ok.”

17) In the list that will be displayed, click the newly created prototype.
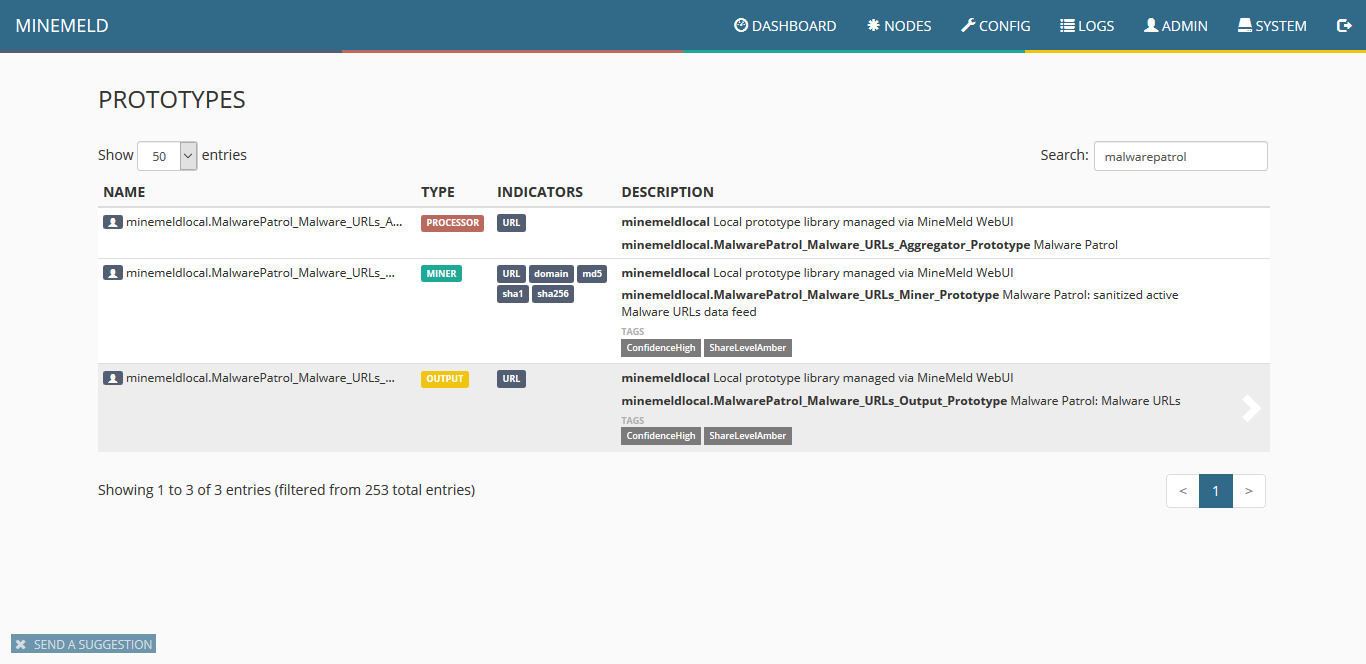
18) Click “clone.”
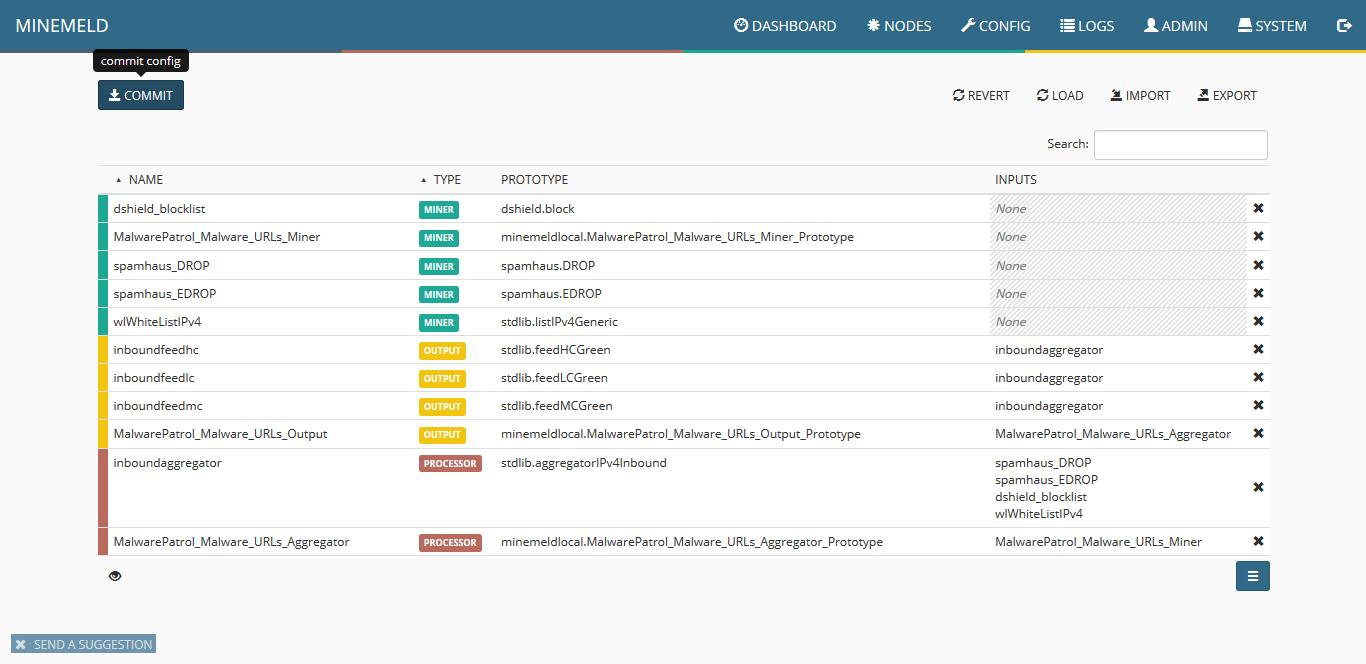
19) At this point, the list displayed should contain one new item for a miner, rocessor and output. Click on commit to make the changes effective. Wait a few seconds as some components of MineMeld will be restarted.
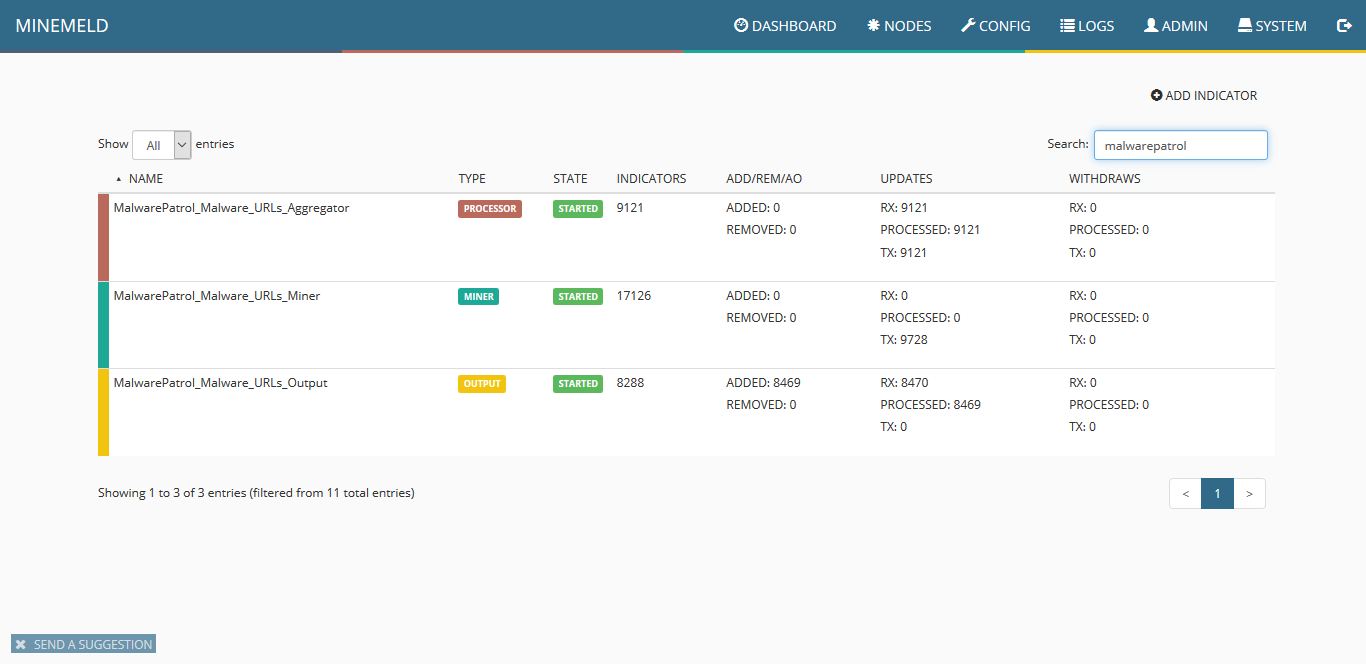
20) Click on nodes and search for malwarepatrol. You should see the three newly created items and the count of indicators increasing. That shows that data is flowing from our data feed into the miner, processor and finally made ready by the output.
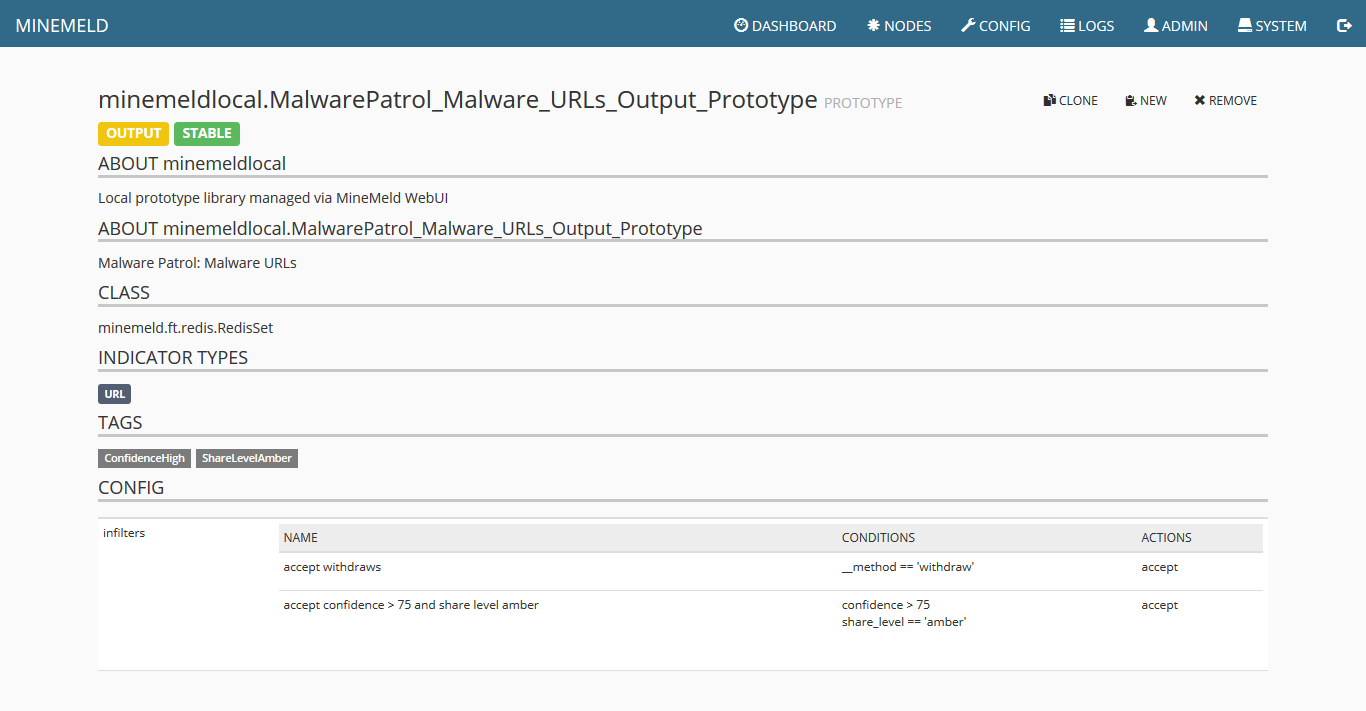
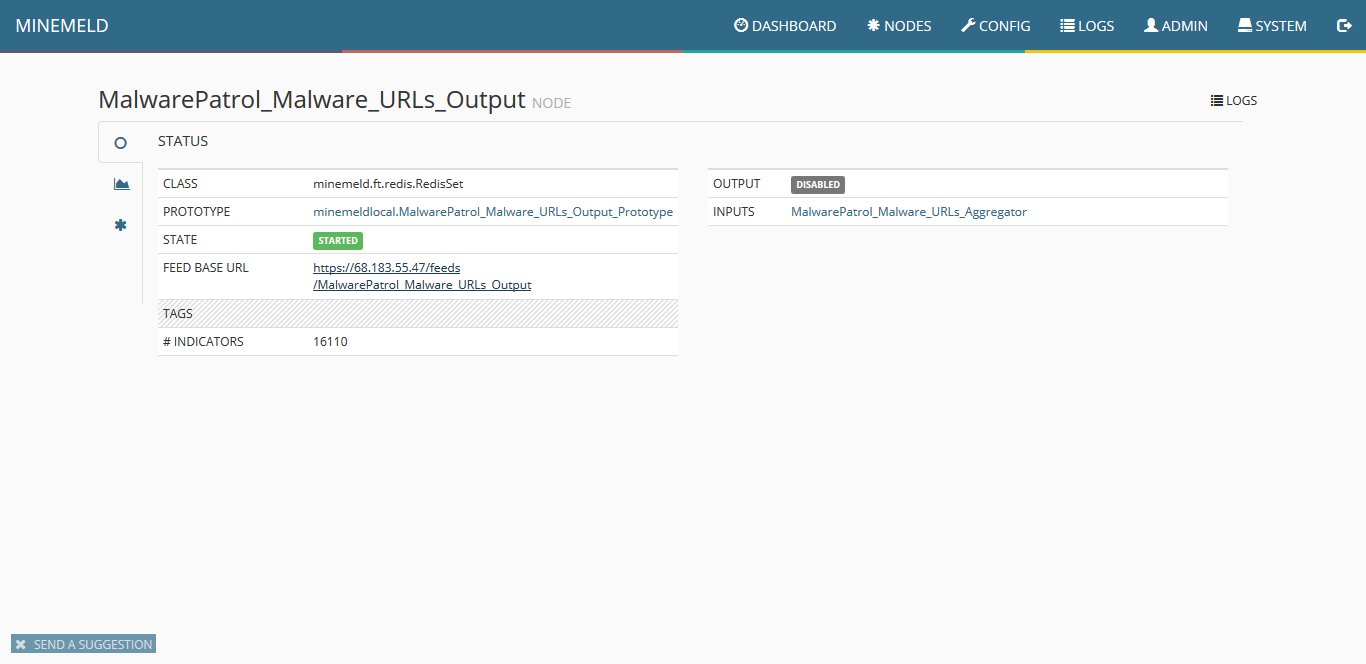
21) Clicking on output you can see details including the URL of the finalized feed that can be consumed by Palo Alto Networks systems.
22) For information on MineMeld and how to connect it with other Palo Alto Networks products and Splunk, please visit the following URLs.
– Create Dynamic Firewall Rules Based on MineMeld Threat Feeds: https://www.virtualizationhowto.com/2018/12/create-dynamic-firewall-rules-based-on-minemeld-threat-feeds/
– Create a MineMeld input in Splunk: https://splunk.paloaltonetworks.com/autofocus-and-minemeld.html
– Quick tour of MineMeld default config: https://live.paloaltonetworks.com/t5/MineMeld-Articles/Quick-tour-of-MineMeld-default-config/ta-p/72042
– Using MineMeld to Create a Custom Miner: https://live.paloaltonetworks.com/t5/MineMeld-Articles/Using-MineMeld-to-Create-a-Custom-Miner/ta-p/227694
– Developer’s Guide: https://github.com/PaloAltoNetworks/minemeld/wiki/Developer’s-Guide
23) If you encounter any difficulties during the configuration process, feel free to contact our tech support at [email protected]
Configuration guides for other systems can be found on our Tech Support page.
Evaluate Our Data
For actionable, current OTI, Malware Patrol offers a wide variety of threat intelligence feeds for use within organizations of all sizes and industries. We verify our feeds constantly – every hour in most cases – to ensure they contain only actionable indicators that protect our customers against malware infections and data breaches. For ease of use, we format the feeds for compatibility with the most popular security tools and platforms. Contact us to learn more or to request a free evaluation.